This blog will follow my progress building a diorama of John Glenn's, Friendship 7 Mercury Capsule Atlas LV-3B 109-D Rocket at NASA Launch Complex 14.
When COVID hit in March, I figured I would be working from home for a couple of Months. When that turned out not to be true. I started looking for some projects to keep occupied. Over the summer I was doing a fair amount of woodworking, but as the colder months moved in, I needed something I could do inside.
My daily routine went from getting up a 6:00am, getting myself and my son ready for work and school in February, to getting up, steadying myself on my feet, then making that long twenty six step commute from the bed to my home office. Thirty Seven steps if I made a stop at the nearest restroom on the way. in
My new routine provided me with two and one half extra hours in the morning to do what ever I wanted. Some days I would get an early start at work, but most, I would sit outside and photography birds at the feeder. It was almost spring, still a little chilly, but not bad. In the evening I would do some wood working. As summer came to an end, I needed to find something to occupy that time inside.
This was about the same time that SpaceX was going to launch two astronauts on the Falcon 9 to the space station. This would be the fist time the United States would launch a rocket with astronauts into space since the end of the shuttle program. This time we were doing with super sleek design by Elon Musk and his team at SpaceX. The Falcon 9 rocket and the Dragon crew capsule looked the part for 2020. It had all the style of any space ship from a science fiction movie.
All this renewed space activity got me as excited. Maybe even more excited than I was when the shuttle program started on April 12th, 1981. As a kid, I was always into rockets. I had built and launched a number of estes rocket, with my first launch in the field behind Nassuet High School in Eastham MA, Cape Cod. It was time to build another rocket 50 years later. Now I just had to pick a design.
SpaceX Falcon 9 rockets were all over Amazon, but I wanted to do something that got me excited in the first place. I was not born when Alan Shepard went into space Alan Shepard aboard Freedom 7 on May 5th, 1961. The same was true for Virgil Grissom aboard Liberty Bell 7 on July 21st of 1961. In fact ,when John Glenn orbited the earth in the Mercury capsule, Friendship Seven on February 20th, 1962, I was still ten months away from being born. Hum, could the space race be the reason for my existence? On May 24th 1962, Scott Carpenter was launch into space on on Aurora 7 followed by Walter Schirra on October 3rd, 1962 in the Sigma 7 capsule. On May 15th, 1963, Gordon Cooper made his first flight in Faith 7.
So, if I was going to be logical about picking a model to make, you would think it would be Walter Schirra's Sigma 7 since his flight was just 28 days before my birthday. But to be honest, I never heard of Walter Schirra till I started researching the Mercury program. The name that always came to mind for me was John Glenn, United States Marine, aviator, engineer, astronaut, and US Senator, first to obit the earth and oldest astronaut to ever go into space at the age of 77. But more importantly, possible the reason for my existence. (October 31, 1962 minus February 20th, 1962). The math is not perfect, but close enough for me. I decided to go with John Glenn and the Mercury Friendship 7 Model. Or was it because that was the only Mercury Rocket model I could find?
In any event, this is how it all started, a $20.00 Rocket Model of John Glenn's Friendship 7 I found on Amazon.

The model was fairly easy to assemble. However, it did have some issues. As I started looking at reference photos, I noticed a few things. First, there was no way a semi truck in the 1950's could have pushed an Atlas rocket up a ramp with a 30 degree incline. Second, the model parts had a terrible issue with flashing that took forever to clean up. The rocket was quite detailed, but the escape tower mount on the top of the capsule was all wrong and overall, the launch complex was not very accurate. To be fair, the model had not been updated in a number of years. I found references to this model going back to the 1960's and no one was going to build a model at 1/110 scale with a 30+ inch ramp at 5 degrees.
Reference Link: Model Review: http://www.hyperscale.com/2012/reviews/kits/revell851833reviewcs_1.htm
Typical for me, at this point, the OCD kicked in with a emphases on the obsession. I started researching and reading everything I could find about the Atlas rocket, the Mercury capsule, Launch Complex 14 and John Glenn. I found a ton excellent footage on YouTube and ordered up a bunch of books from Amazon. Over the next few months, I compiled a 2 inch binder of reference photos, diagrams and notes. I was even able to find some unofficial blueprints.
Assembly Begins:
Assemble and painting began over the Thanksgiving break of 2020.
Before the model was even completed, I decided I wanted a diorama. I found an old foam board I had and stuck it on a 16x48" piece of 1/2 inch plywood. The obsession had really begun.

Grid lines were drawn, surface contours were mapped out and we were off.

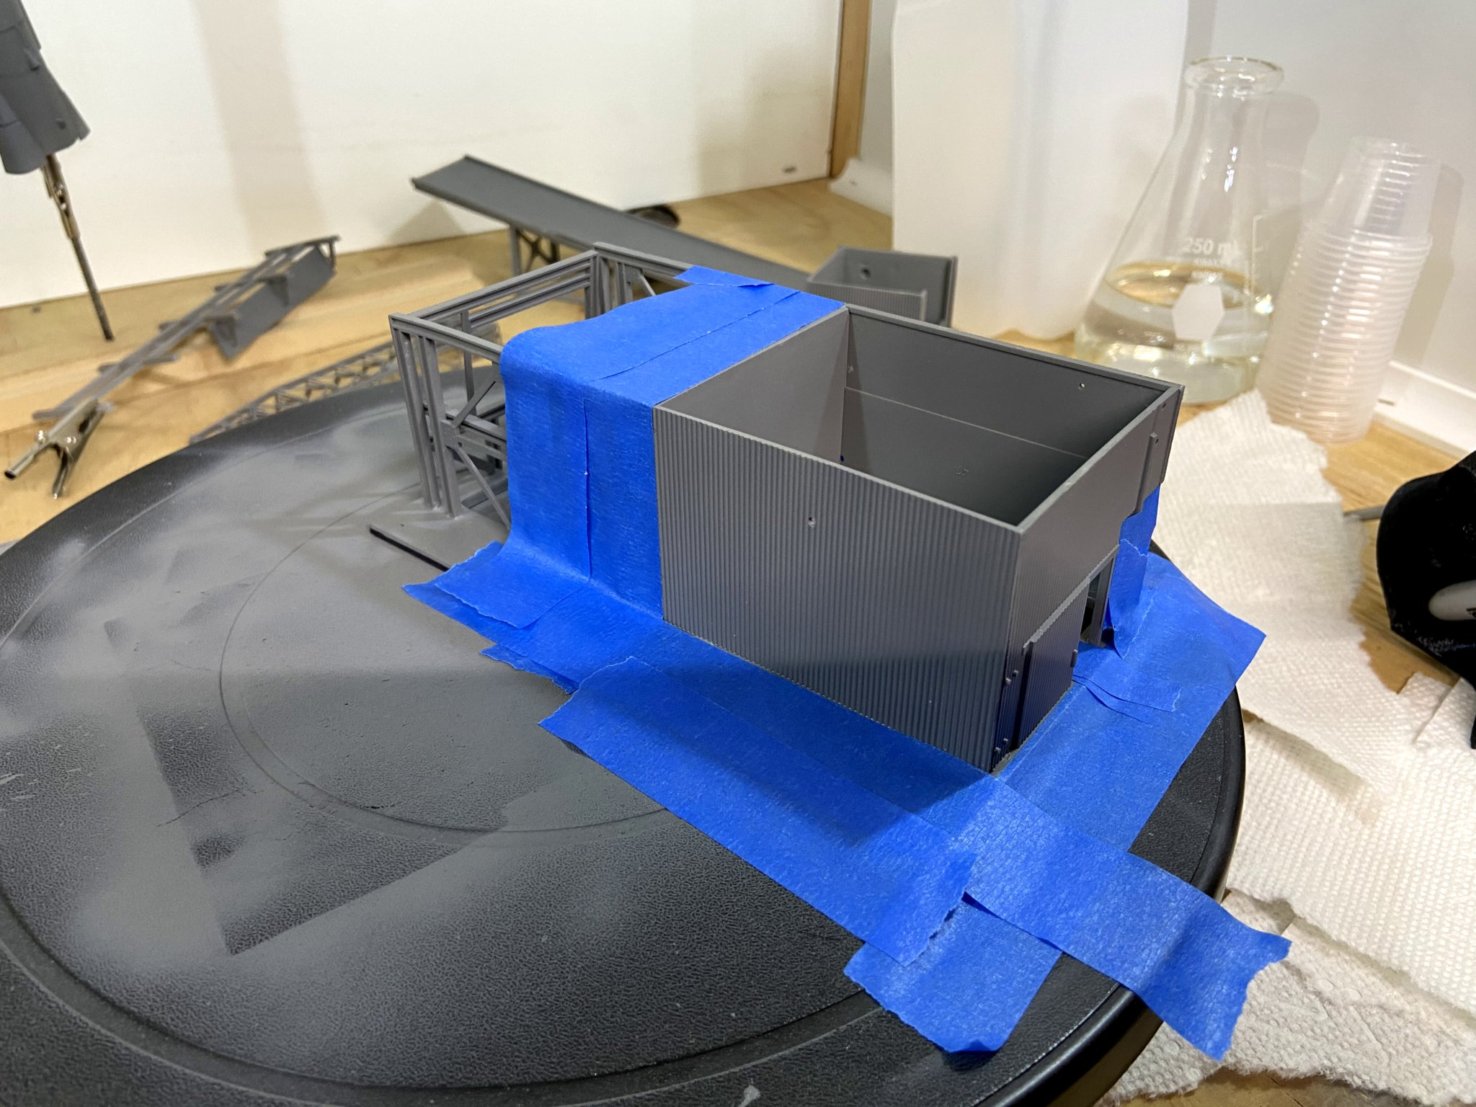
One of the first things I needed to design was the drainage ditch. I made a quick sketch in Fusion and printed one out on the 3D printer.
For legal reasons, I will only provide links to reference photos I used. I will not embed photos that are not mine in the blog.
Reference Photo: Overhead Photo of Launch Complex 14 with showing drainage behind service tower: https://en.wikipedia.org/wiki/Cape_Canaveral_Launch_Complex_14#/media/File:Aerial_View_of_Launch_Complex_14_-_GPN-2000-000609.jpg


